Monthly Archives: February 2013

Treat Night

Plate Of Chocolate Chip Cookies Resting On A Red And White Chekered Table Cloth By A Glass Of Milk Clipart Illustration

For several years now, we have something every week in our family that we call “Treat Night”.

Treat Night is simply 1 night out of the week that we set aside to do something together as a family and we always have a special treat to eat…just very laid- back.

Our family loves old, classic movies and the old TV shows. So, currently on Treat Night- which is Tuesday evenings for us- we are working our way through the Gunsmoke series’. (we love westerns!) But if you did not want to involve watching something- you could play games or have a Story time together- or whatever would be special to do together.

This also gives me an opportunity each week to bake up a yummy treat for us to enjoy.  Usually it’s some type of cookie or bar- nothing elaborate since I usually prepare them after dinner and don’t have  a lot of spare time at that point.

All of us look forward to treat night! The kids are always super-excited when they realize it’s Tuesday (aka “Treat Night”).

I know this is not some brilliant idea that no one has ever though of before, but I love simple family traditions. Little times like these make memories and make home a little more special. Actually sometimes my 6 year old will say on Saturday…”Only 3 days ’till treat night!” This always makes me chuckle, because you would think it was some big occasion coming up. But, I think it IS a special occasion to them…and I love that!

Happy Treats,
Kari


Honey Chocolate Chip Muffins

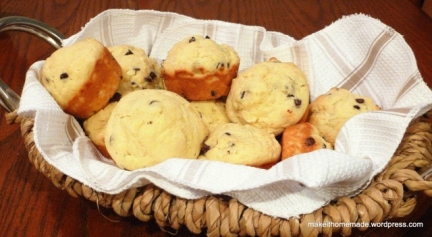
P1010746-001I love these simple little muffins. They are light, and have a gentle sweetness- nothing overbearing or heavy.

Sometimes less is more, and I think that sums up these little melt-in-your-mouth muffins perfectly. I think you will agree.

2 cups all-purpose flour

1/4 cup sugar

1 Tbs. baking powder

1/2 teaspoon salt

1 egg

1 cup buttermilk (or milk)

1/4 cup butter, melted

1/4 cup honey 

1/2 cup mini chocolate chips, semi-sweet (obviously you can use regular chocolate chips instead, but I like the mini chips because they give you little bits of chocolate sprinkled throughout your muffin instead of larger chunks.)

In a bowl, combine the flour, sugar, baking powder and salt.

In another bowl, combine the egg, milk, butter and honey.

Pour into the dry ingredients and gently stir, just until moistened.

Grease your muffin tins (or use paper liners)  and spoon in the batter. This should fill 12 muffin cups about 3/4 full.

Bake at 375 for dark coated pans (400 if it’s a shiny pan) for 15 minutes or until a toothpick inserted near the center comes out clean. 

Remove from pan to a wire rack. Serve while still warm. Spread with butter!

Baked Macaroni and Cheese

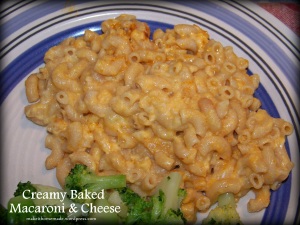
Recipes 002Macaroni & Cheese has to be in the top 5, at least, in the comfort food world. This creamy version is no exception! I have always used this particular recipe as my “go-to” for mac and cheese- and it is often requested for birthdays and get-togethers in my extended family. Kids (and adults) love it, as there are no funny chunks or flavors or hidden pieces of this or that tucked inside. No- this is plain and simple mac and cheese at its unadulterated best!

Perhaps you usually think of Macaroni and Cheese as a side, but I almost always use this recipe as my Main Dish. I generally try to have 1 meatless meal on the menu each week, and I think this dish works perfectly for that. For the meal, serve it with a green vegetable and muffins or pinto beans. (My mom makes mac and cheese with pinto beans and stewed tomatoes. I LOVE that! But, since I’m the only one in my household that will eat stewed tomatoes- I don’t get to make it that way. Poor me.)

So, without further comment, here is the recipe for this thick, creamy, cheesy, hot and steaming, bubbling macaroni and cheese!

8 oz. macaroni (I like to use whole wheat to boost up the nutrition)

2 Tbs. butter

2 Tbs. flour

1 tsp. salt

2 1/2 cups milk

2 cups grated sharp cheddar cheese, divided

paprika

Bring water to a boil. Add macaroni, and cook according to your package instructions. Drain. Place in a lightly greased casserole dish. (an 8in, 11x7in or a 2 qt. will work fine)

Meanwhile, melt the butter in a pot over medium-high heat. Once melted, stir in flour and salt until the flour is fully incorporated with the butter

Add milk

Using a whisk, which will help to break up the clumps, stir almost constantly until the mixture thickens.

Add 1 1/2 cups of cheese and stir until melted (and just as a side note, I almost always prefer to use freshly grated cheese. I think it makes a big difference in the texture of the sauce)

Now pour all of the sauce over the macaroni and give it a little stir to make sure there is sauce in all the cracks.

Sprinkle the remaining 1/2 cup of cheese over the top

Sprinkle with Salt and Pepper, to taste.

Lightly sprinkle with paprika (optional)

Now bake, uncovered at 375 for about 20-25 minutes, or until bubbly.

Chewy Peanut Butter Granola Bars

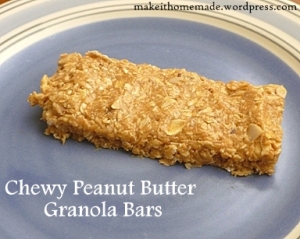
P1010731I have been on the search for a good, homemade granola bar for a while now. I had a fairly good idea what I was wanting to start with: a simple, basic bar without a lot of frills and something healthy  I also did not want a crunchy bar. Chewy is better, in my opinion. I found a few good-looking looking options, but nothing seemed to really hit the nail on the head for me. Finally, I found a recipe that was pretty basic. I tried it and liked it a lot! Since then, I have added or subtracted this or that and have come up with a granola bar recipe that I really love. I almost always have a pan of these in my refrigerator. I love to eat them for breakfast with a glass of milk, or for a quick snack. I find them to be very filling. My hubby likes them, too- and they are easy for him to take along with him in the mornings to eat on the way to work. My kids think everything has to involve chocolate in some way- so we compromise and I skim a little Nutella on theirs.

These little gems are also super quick to mix up and very adaptable to your own tastes. Hope you enjoy them, too!

NOTE: all of these measurements are approximate. You can add a little more or less of all of these ingredients, based on your personal preference! I change it around sometimes, too. The version below is my favorite.

3 1/2 c. old-fashioned oats

1/2 c. slices almonds

1/2 c. pecan halves or pieces

1/2 c. shredded, sweetened coconut.

1/4 c. milled flax seed (very optional- but boosts the nutrition a lot)

1/2- 3/4 c. honey

3/4- 1 c. peanut butter

1. Combine the oats, nuts, coconut, and flax seed in a large bowl.

2. Mix it up

3. With mixer running on low speed, slowly pour in honey. You have enough honey when the oat mixture is sticking together and looks sticky.

4. Melt the peanut butter. (I just put mine in a bowl and microwave for about 30 seconds.)

5. Pour in the peanut butter and mix just until well combined

6. Grab a 9x 13 dish and dump all of the mixture into it.

7. Press the granola mixture into the dish

(if the granola looks crumbly or dry, you don’t have enough honey or peanut butter. It should easily press into the dish and should not fall apart)

8.  Cover and Refrigerate. (You do not HAVE to refrigerate, but this is how I prefer to keep them)

After they have chilled for just a little while, you could cut them into bars or you could just keep them in the refrigerator and cut them as you need them. That’s what I do!